

A1 Manual
0. Introduction
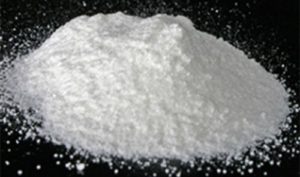
A1, the abbreviation for Acrylic One, is a two-component material consisting of a mineral powder and a water based acrylic resin. These bind in such a way that a strong material is created. A1 has many unique properties. These contribute to its strength, durability, weight to strength ratio, non-toxic, easy to manufacture and its ability to comply with many of the necessary test requirements of the construction industry, specifically those in regard to performance to fire and performance under impact.
In this manual we introduce you to the possibilities of working with A1. A manual full of examples, how to’s, tips and sometimes what to avoid. We have divided this manual into 21 chapters which you can find below. This manual can also be downloaded from our website via this link. If you have any questions left after reading our manual, do not hesitate to contact us at info@acrylicone.com. You can also use this email adress if you prefer to receive a printed version of our manual.

1. A1 (Acrylic One)
and its ability to comply with many of the necessary test requirements of the construction industry, specifically those in regard to performance to fire and performance under impact.A1’s potential use is wide-ranging and could effectively replace much GRG, GRC and GRP in many of the situations where those materials are now used, both in- and outdoor. In comparison with GRC, A1 offers much greater versatility, as a panellised cladding system in that the manufacturing tolerance can be much tighter. A1 possesses a high resistance to ultra- violet degradation. It can, therefore, be used in the situation where other materials would suffer.
Main application areas:
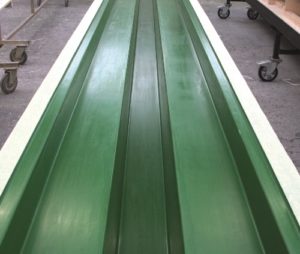
Cladding & Façade panels
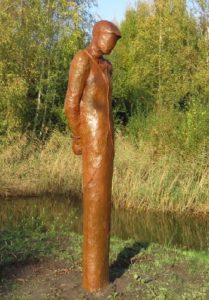
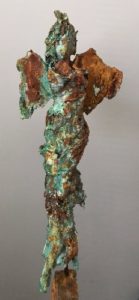
Art & Sculpture
Theming & Decoration


Properties
- Very high fire resistance properties
- UV stabilised
- Rainwater resistant (if sealed)
- Good mechanical properties
- Low heat generation (max 45 °C)
- Shrink free
- Solvent-free
- Low peak exotherm
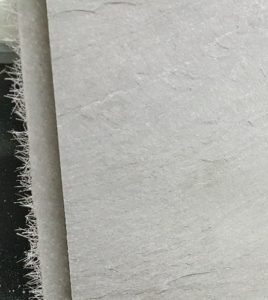
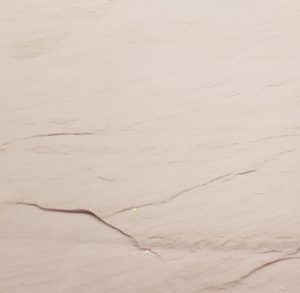
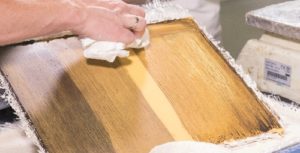
Surface finishes
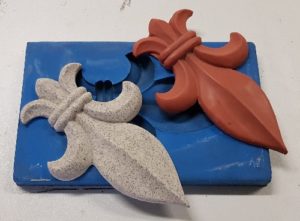
A1 should be viewed as a matrix in which a variety of filler materials can be incorporated, either to enhance mechanical performance or for the sake of appearance. It is possible for A1 to include any non-reactive filler up to, and in some cases exceeding 200%. This allows a great deal of freedom when deciding upon encast and ex-mould finishes.
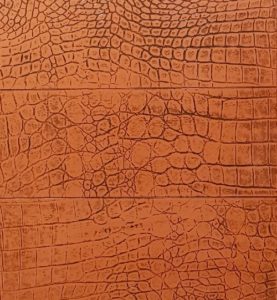
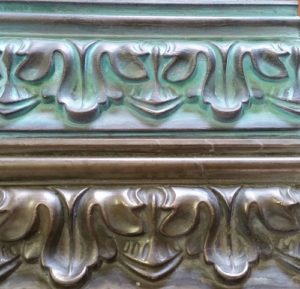
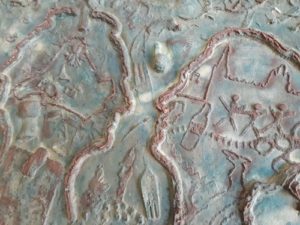
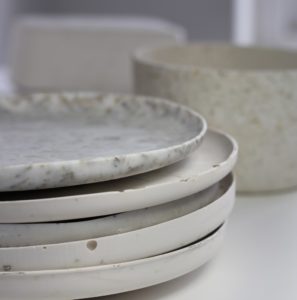
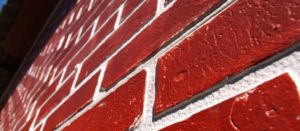
An extensive and impressive range of finishes has been produced. These include a variety of metals (bronze, brass, copper and stainless steel), pigmented materials imitating terracotta, brick and pottery and encast stone finishes from white marble through to dark granite, Portland and Bath stone. It is thus possible to create a finish to meet the designer’s specification rather than, as is usual, the designer having only two or three established finishes from which to make a choice. The standard finishes that can be produced are extremely high, both in their resemblance to the materials that they are imitating and in the quality of the surface finish.
A wide variety of finishes can either be incorporated into the material as a facing in the mould, where this is going to be backed up by a lamination or other composite foam material, or they can be included in the mix if the material is being used as solid cast. The method of manufacture obviously varies from situation to situation depending upon the design. A range of fine textures and colours can be further produced. These include leather and cloth through this specialised process.
Design
A1’s excellent weight-to-strength ratio means that when used as a lamination the designer is allowed greater freedom to produce large panels. Complex and fine details are possible. When this is considered in combination with the ease of fixing and calculation of load, A1 can be seen as a major step forward in pushing back the boundaries of design limitation.
One-offs
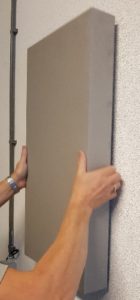
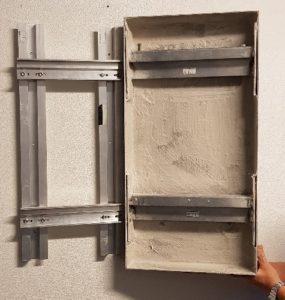
Special or ‘one-off’ units can be easily produced alongside standard run and if site tolerances have not been strictly observed the panels can be ‘humoured’ to fit and made good on site. Of great significance is the material’s high strength to weight ratio, which allows much lighter fixing systems and sub-grids. All these attributes contribute towards further potential savings having started with a material, which has already cost advantages over alternatives.
Maintenance
The surface finish of A1 is extremely durable and will withstand aggressive use. For public areas, the material can be treated post-mould with an anti-graffiti coating which allows for the removal of paint, crayons, pens, etc. In normal maintenance conditions, the material can be simply washed with detergents and water or, if required, with stronger substances such as solvents, with no detriment to the surface finish.
In this brochure you will find information about working with A1, available additives and fillers.
Disclaimer
The information in this user manual is considered accurate. It is however not possible to derive any rights from the information with regard to its accuracy, the achieved results by using the product, nor that the use of the product would breach a patent. The user needs to ascertain the suitability of the product for the application the user wishes to apply. When in doubt, the user needs to carry out tests to ascertain the suitability of the product. The technical data sheet of any A1 (Acrylic One) product is available upon request and must be read and understood before use.
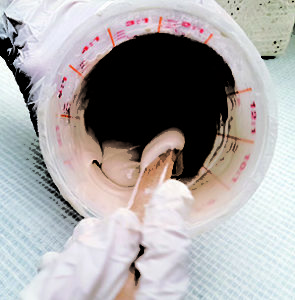
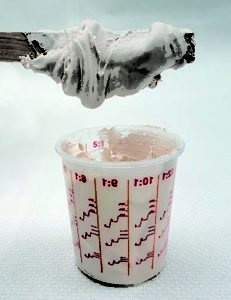
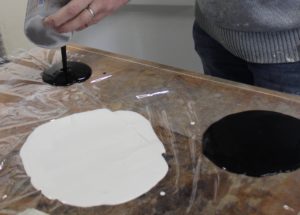
2. Weighing and mixing of A1
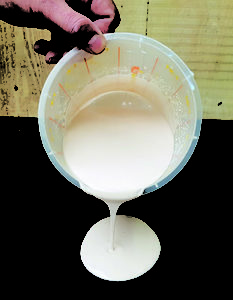
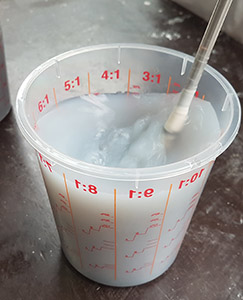
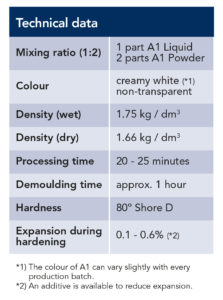
A1 is a combination of A1 Liquid and A1 Powder in the mixing ratio: 1 part A1 Liquid and 2 parts A1 Powder (1:2). This is always based on weight.
Mixing can be done with a spatula (small quantities) or with a High Shear mixer. First, start stirring the A1 Liquid and gradually add the A1 Powder. The A1 is ready when any lumps have disappeared. Mixing takes about 1 minute. Try to mix with as few air bubbles as possible in the A1 by keeping the mixer head under the surface.
You can download our mixing manual for an visual presentation of mixing A1.
Processing time
After mixing, the standard processing time is 20 – 25 minutes. If a shorter or longer processing time is required, A1 additives can be added.
Settling time
A1 is a water-borne product. Residual moisture must evaporate to obtain the final properties. The time required for this is highly dependent on external factors such as the size of the object, temperature and humidity. If the object is laminated or cast in a mould, it can already be removed from the mould as soon as the strength is sufficient to withstand the forces that occur during this process. The product can then reach the optimal strength outside the mould.
Colour
Without fillers or colourants A1 has the appearance of cream-white coloured stone.
Hardness
A1 has the hardness of approx. 80 Shore D.
Tool cleaning
Skin and hands can be washed with soap and water. Tools can be cleaned with water.
Settling tank
The settling process also continues under water, which is why we recommend removing the tools from water immediately after cleaning. Use a separate bowl of water to clean tools and hands where you can let the A1 sink (minimum 24 hours). After 24 hours, surface water can pass through the sink. The A1 sediment can be left to dry, be disposed of with the residual waste or be reduced and processed as filler (max 1/3).
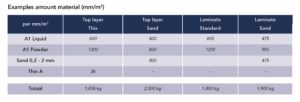
Calculation of A1 needed
When applying 1 layer of A1 of 1 mm thickness you will use 1.75 kg A1 per m2 (1 liter A1 = 1.75 kg).
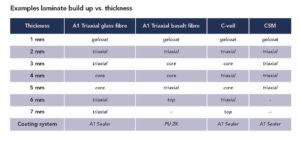
In a mould you normally work with a first layer of 1 to 2 mm. Next, we advise to use 3 layers of A1 Triaxial fibre. In order to achieve this will have to apply 4 layers of A1 of 1 mm. Normally in a mould we thicken A1 for the first layer with Thix A. Make sure this layer is hardened before applying the next layers to avoid print through of the A1 Triaxial fibre. Use 1 layer of A1 between your hardened first layer and the first layer of A1 Triaxial fibre in order to make a proper bonding.
As an example needed for a project of 5 m2:
– 2 mm 1st layer
– 4 layers of 1 mm A1 in order to apply the 3 layers of A1 Triaxial fibre
Total 6 mm of A1 x 1.75 kg per layer x 5m2 is 52,5 kg of A1, consisting of 17.5 kg A1 Liquid and 35 kg A1 Powder.
Be aware that this is an indication and not a general rule.
You can download our mixing manual for an visual presentation of mixing A1.
3. Additives
To optimise the processing of A1, additives are available, which can extend or shorten the processing time, or thicken or dilute A1.
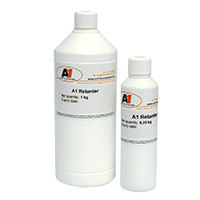
A1 Retarder can be used to extend the processing time. Add a maximum of 1% of A1 Retarder to the total weight. As a rule of thumb, you could add 0,3% A1 Retarder to the total A1 weight of the mixed A1 for 20 minutes extra processing time.
We suggest to add the A1 Retarder to the A1 Liquid before adding the A1 Powder.
A1 Accelerator can be used to shorten the processing time. Always add the A1 Accelerator to the A1 Liquid. A1 Accelerator can also be used to correct any delaying effects of some pigments and fillers.
Add a maximum of 1% of A1 Accelerator to the total weight.
A1 Thix A is an additive to thicken the product into a gel. This thixotropy agent is used to make gelcoats and to manufacture vertical or overhanging parts. Add the A1 Thix A to the created A1 until the desired thickness (viscosity) is reached. The maximum percentage A1 Thix A you can add is 2% to the total weight. Adding more eliminates the effect again.
A1 Thix B is an additive to thicken the product into a gel. Add A1 Thix B drop by drop to the A1 mixture until the correct thickness is reached.
Due to the reduced water resistance of A1 when using A1 Thix B, we recommend not to use this product if the object is exposed to an outdoor environment.
A1 Diluent lowers the viscosity of A1. This can be used to cast complicated products. A1 Diluent can also be used to use more fillers. A1 Diluent may affect the processing time. Use a maximum of 5% A1 Diluent relative to the total weight.
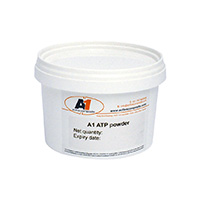
A1 ATP Powder is a volume thickener. This allows the A1 to be thickened to filler thickness. This thickened A1 an be used to finish an object and apply a smooth surface. We recommend using A1 ATP Powder exclusively for indoor applications.
Thickening A1 with Thix A
When working in the mould, the 1st layer of A1 is important, as this is ultimately the visible layer. We recommend thickening the 1st layer of A1 with A1 Thixotrope A (Thix A).
With the A1 Thix A you can turn the A1 into a beautiful pasta. Because of the thickening, the A1 stays in place, even when working in a mould with vertical parts. It is also possible to apply a pigment, metal powder or dried sand to the 1st layer.
Add the A1 Thix A to the created A1 until the desired thickness (viscosity) is reached. The maximum percentage A1 Thix A you can add is 2%. Adding more eliminates the effect again.
Create your own wall filler with A1 ATP Powder
You can make your own wall hole filler by adding A1 ATP Powder to the A1. First mix the A1 Liquid and the A1 Powder together. Then add A1 ATP Powder as needed to get a firm paste. As an indication you can add about 30-40% of ATP Powder to total weight of the A1. With the help of a putty knife, holes can be easily sealed.
Adding A1 Retarder
The standard processing time of A1 is between 20 and 25 minutes. If desired, it is possible to extend this processing time. We recommend a processing time of max 1 hour.
As a rule of thumb, you could add 0,3% A1 Retarder to the total A1 weight of the mixed A1 for 20 minutes extra processing time. This is 3 gram per kg A1 for 20 minutes extra processing time. This time also depends on the A1 Powder and can deviate. That is why we advise you to perform a small test beforehand.
We recommend that the A1 Retarder is first added to the A1 Liquid before it is mixed with A1 Powder.
Gelcoat
When working with A1 a gelcoat is used regularly.
This gelcoat can be made in the following way:
– Mix the A1 Liquid with the A1 Powder until a smooth mixture is obtained.
– Add to the A1, if desired, pigment in the right colour and/or other materials such as dried sand and metal powders.
– Add A1 Thix A until the desired thickness (viscosity) is reached. The maximum percentage of A1 Thix A you can add is 2%. Adding more will eliminate the effect.
– Apply the gelcoat to the mould with a brush, for example. Keep a layer thickness of at least 1 mm.
– After gelling of the gelcoat (20 – 25 minutes) we advise to continue working within 1 hour to keep the adhesion optimal.
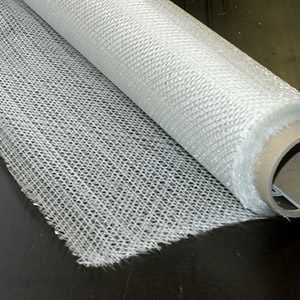
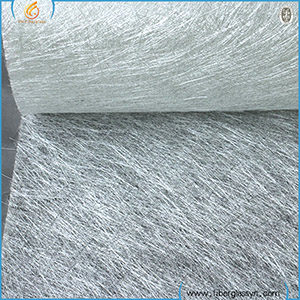
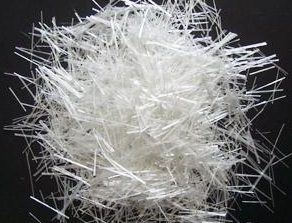
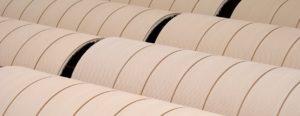
4. A1 fibre reinforcement
A1 Triaxial glass fibre 160 gr/m2
- A1 Triaxial glass fibre is used in combination with A1. In this way, A1 objects can be created or covered in moulds with A1. Triaxial glass fibre strengthens the A1 objects.
- A1 Triaxial glass fibre has an open structure and has been specially developed for A1.
- It is flexible and easy drapable, even over round shapes.
- Lightweight (160 gr/m2) yet very strong.
- After use of 4 layers in combination with A1 vandalism proof.
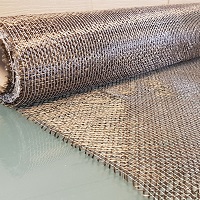
A1 Triaxial basalt fibre 160 gr/m2
A1 Triaxial basalt fibre can be used as fibre reinforcement. Although the A1 Triaxial glass fibre causes little irritation, it is a good alternative for people who are sensitive to working with glass fibres. It’s also alkaline resistant.
CSM 150 gr/m2
There are also good experiences with the use of CSM 150 gr/m2 as this has a relatively open structure.
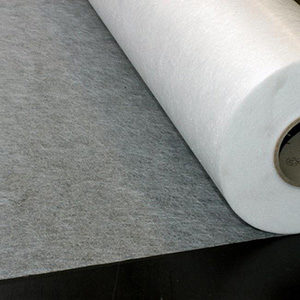
C-veil 27 gr/m2
C-veil glass is a thin glass fleece that is mainly used as a (smooth) finishing layer. It contributes little to improving strength.
Use of natural fibres
Natural fibres are offered as an alternative to glass and basalt fabrics. A major disadvantage of these fibres is the tendency to absorb and retain moisture, which disturbs the moisture balance in the A1. This moisture absorption can also cause fungi to develop and eventually affect the A1 object. For outdoor applications, the use of natural fibres is therefore not recommended.
How do you process A1 Triaxial Fibre?
A1, unlike polyester, does not absorb A1 Triaxial fibre but clamps it in between the different layers of A1, as it were. That’s why our glass fabric has an open structure that allows the different layers of A1 to connect to each other and to clamp in the A1 Triaxial fibre.
The best time to start laminating over the top layer is when it is drying but still feels slightly moist. immediately after the set time has expired.
The best result is achieved when the laminating layers are applied wet to wet. An advantage of A1 is that after a few days you can still apply A1 with A1 Triaxial fibre with a good adhesion. However, the substrate must first be coated with a wet layer of A1 before the A1 Triaxial fibre can be applied. Even with larger surfaces it can happen that the A1 already reacts (is hard) before a new layer of A1 Triaxial fibre can be applied. This can be solved by applying a new thin layer of A1 or by slowing down the reaction time of the A1 using A1 Retarder.
Test values for mechanical properties
For the determination of the mechanical performance of A1 composite laminate panels have been made by hand lay-up of glass fibre reinforcement (Triaxial Fibre 300, 160 g/m2 ) with A1 mixture.
The laminate panels have been made without a gelcoat-layer (non-reinforced resin layer) and without any other additives. Laminate panels were built up on a flat, smooth panel as a mould.
All reinforcement layers have been stacked with the same orientation.
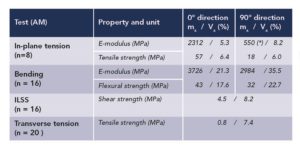
For more information see our report: Design Guide A1 structures.
5. Pigmenting of A1
Assortment
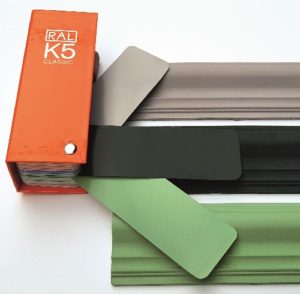
The base colour of A1 is ivory white. If desired, we have A1 suitable pigments in 10 colours with which the A1 can be coloured through and through. The following liquid pigments are available: white, yellow, orange, ochre, terracotta, magenta, red, blue, green and black.
These pigments are highly concentrated and are added up to a maximum of 2% to the A1. Often a lower dose is sufficient to achieve the desired result. The A1 Pigments can be mixed with each other so that almost all RAL colours can be made.
Constant colour
We advise to work with 1 batch of pigment to prevent colour differences as much as possible. It is also possible, especially if a constant colour is required for large projects, to provide all the necessary A1 Liquid with a colour pigment in advance. It is almost impossible to achieve a 100% equal colour for all products. That is why we advise you to make it clear that colour differences are possible.
From ivory white to white
White is available in many colours and often one of the more difficult colours to realise. A few suggestions to achieve the desired white look are:
– Use our A1 extra white version,
– A1 with max 2% white pigment,
– A1 Sealer white pigment and then apply in 1 or more layers. Finish with a non-pigmented A1 Sealer layer,
– a combination of the above possibilities.
It is possible to use pigments from other suppliers to colour A1. In some cases, these pigments can affect the quality of the A1, ranging from slowing down/blocking the curing process to decreasing the weather resistance. Hence our advice to test this in advance.
Dark colours absorb more heat than light colours. We also see this happening with dark coloured A1 objects. Although it does not affect the quality of the A1, these high temperatures can affect the materials and construction used in the A1 object.
UV exposure
The present A1 pigments are UV stable for a considerable period. However also A1 with pigment will change colour due to the influence of the weather. How much is difficult to say as this depends on the intensity of the weather influence on the A1 object, the use of a sealer or coating system, the % of pigment used and the colour of the pigment.
Concrete look
The best way to create a concrete look is to add black sand, A1 pigments and possibly some Fillite. This is a lightweight grey filler. Be careful with adding cement powder as the curing can slow down enormously and the cement powder may react to the A1 in the longer term. We recommend adding a maximum of 10% of cement powder to the total quantity of A1.
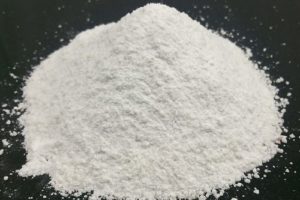
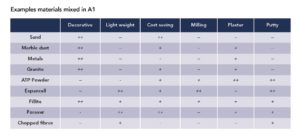
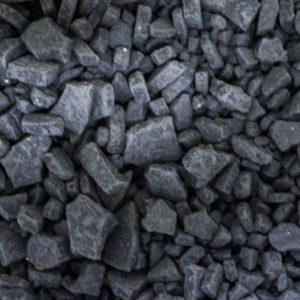
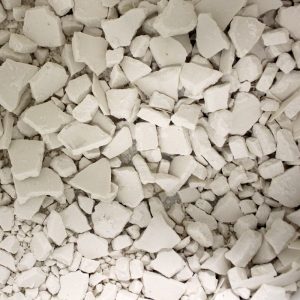
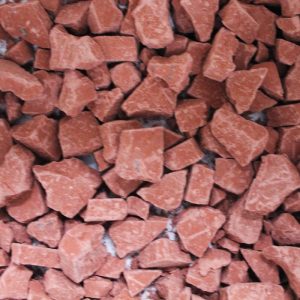
6. Fillers
This allows you to give the A1 a different look, change its properties and possibly save costs.
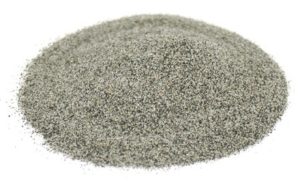
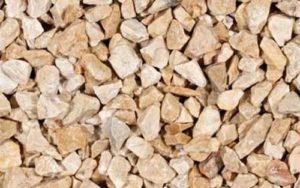
Frequently used materials are dried sand, very fine stones, marble powder, etc. Particle size is up to the costumer’s requirements but most common used is 0.1 – 2 mm. In addition to their aesthetic properties, these give the A1 a scratch-resistant and extra-hard top layer. By using sand of different colour and size, a granito or granite appearance can be obtained. In this case, after curing, the top layer can be sanded to bring the stone to the surface to obtain a greater contrast. Sand from the seaside is not suitable as it contains salts.
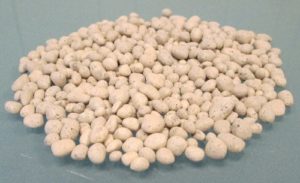
A special filler is expanded glass (Poraver), these are lightweight recycled glass balls. The main advantage is weight saving. For a good adhesion between the grains, it is possible to mix them beforehand with a limited quantity of A1.
Fillers that can be used:
Which Fillers can I use to reduce costs?
Poraver (expanded glass) can be used as a filler for A1. This is a recycled lightweight glass ball that allows you to achieve a large volume gain. Add the grains little by little to the A1 base.
Adding fillers to the A1
First mix the A1 Liquid (1 part) with the A1 Powder (2 parts). Then gradually add the filler to the A1 (maximum 2 parts). Add A1 Diluent if desired.
We recommend adding a maximum of 0.67 kg fillers per kilogram of A1 created, whereby the ratio is 1 part A1 Liquid, 2 parts A1 Powder and 2 parts filler (all by weight).
A combination of fillers and/or pigments is also possible.
7. Processing methods
CASTING
After mixing, A1 can easily be poured into the mould.
A number of techniques are available to prevent air bubbles on the surface:
- Use the A1 High Shear mixer.
- Start (if possible) by brushing the mould, so that all unevenness/relief is touched with A1. The brush stripes disappear due to the fluidity of the material.
- the other A1 mass is poured along the edge so that the A1 can flow smoothly into it.
- You can fix any remaining air bubbles by tapping the side of the mould or by using a vibrating plate. If you have not created enough A1 for the mould, it is possible to add a new A1 layer within 1 hour.
Releasing the mould is often possible after 1 hour. For vulnerable objects, this period may be longer.
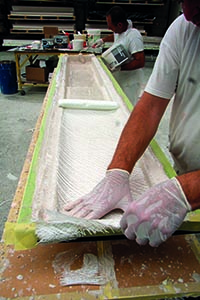
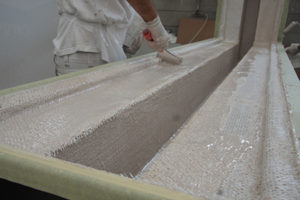
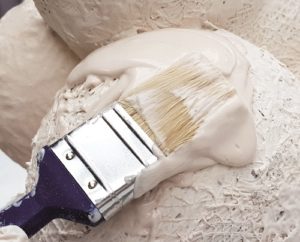
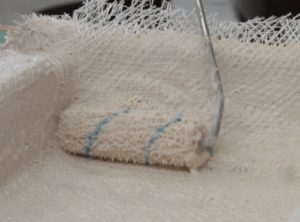
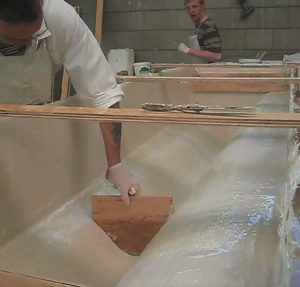
BRUSH, ROLLER OR SPATULA
With a brush or coat roller the A1 can be applied in a thin layer. This is particularly suitable for the application of a 1st layer A1, the so-called gelcoat layer or for laminating glass fabric such as A1 Triaxial fibre.
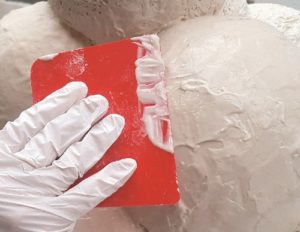
The brush or roller can be cleaned afterwards with water. A spatula is suitable to obtain a smooth finish. For this we advise to thicken the A1 with A1 Thix A or A1 ATP Powder.
ROTATIONAL MOULDING
In a closed (silicone) mould, you can not only cast solid but also rotational. For this we have a special A1 rotation version available (A1 Rotation).
An important advantage of rotary casting is the weight saving, because only a limited amount of A1 is required compared to solid casting. The result is a lighter, but also directly a slightly more fragile object. When rotational moulding, you pour the A1 Rotation into the mould and then rotate it so that the entire inner wall of the mould is covered.
Rotate the object until the A1 starts to harden. You can check the moment of curing by checking the curing in the mixing cup. The hardening time of the A1 Rotation is around 30 – 40 minutes. The rotation can be done by hand or with a rotary machine. If desired, you can choose to have a 2nd or even 3rd layer of A1 by applying it through rotation.
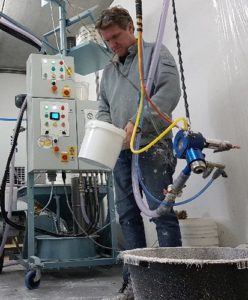
SPRAYING
A1 is easy to spray. This makes it possible to apply a thin layer of A1. This technique is ideally suited for working with a (silicone) mould, but also for applying A1 on, for example, a form made of EPS (Expanded Polystyrene).
For the cup-gun a minimum nozzle size of 1,5 mm is required. A good result you get with 2,5 or 3 mm. Even a 3,5 mm can be used. We suggest to sift the A1 before spraying to remove lumps.
With a hopper gun the nozzle size can be bigger. Depends a little on the desired surface quality. Most hopper guns have a nozzle size of 4 – 6 mm. For large quantities it is also possible to use a big spraying machine with chopped fibers.


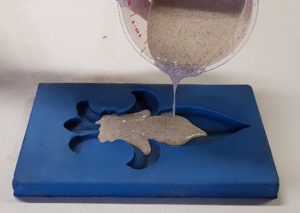
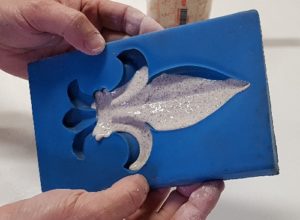
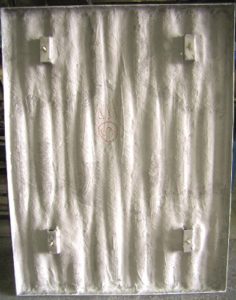
8. Moulds
It is important that no adhesion can take place between the mould and the A1. Silicone rubbers are excellently suited for this purpose and therefore we also recommend working with moulds made of silicone rubber.
A silicone mould has a number of other advantages, such as:
• flexibility of the mould is very useful when demoulding the A1 object.
• Because A1 does not shrink but has a small expansion during the reaction process between the A1 Liquid and the A1 Powder, an exact (detailed) impression of the silicone mould is created.
• A1 does not affect the silicone. This makes it possible to create an infinite number of A1 prints.
A silicone mould may be less suitable for dimensionally stable products. In addition, poor quality silicones (often cheap) with a high fat content can give off, which is sometimes visible on the A1 object.
Moulds made of sheet material such as epoxy plywood forms or polyester moulds work well in practice if provided with a suitable release agent. During hardening, A1 expands slightly. This can cause A1 to get stuck in the mould, especially when it is not self-discharging. Moulds made of gypsum or other porous materials are not recommended unless they have a fully sealing coating or washing system that prevents moisture from the A1 from penetrating into the mould. There is a risk of a (strong) bond between the mould and the A1 and a weakening of the A1 object.
When using a release agent, (limited) release agent may remain on the A1 object after release. Often these release agents are based on fat/oil. This can affect the adhesion of even finishing coats such as A1 Sealer, paint system or an extra layer A1.
Therefore, we advise to limit the use of release agents as much as possible or to work with mould materials that do not bond with A1.

9. Laminating in a mould
When we start lamination we first apply a 1st layer A1, possibly thickened with Thix A, often with pigment, sand, metal powder and/or other materials to achieve the desired appearance. Before we start laminating it is important to let this layer dry (maximum 1 hour), to prevent the A1 Triaxial fibre from pressing through.
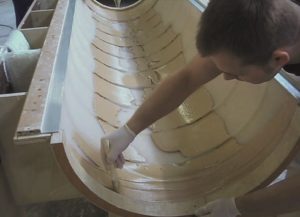
After applying the top or 1st layer in a mould, the time has come to continue applying the next (glass fabric reinforced) layers A1, when the top layer is already drying but still feels slightly moist. This moment is immediately after the set time of A1 has expired and is also dependent on ambient temperature, humidity and the use of A1 additives. This way you get a good adhesion between the different layers.
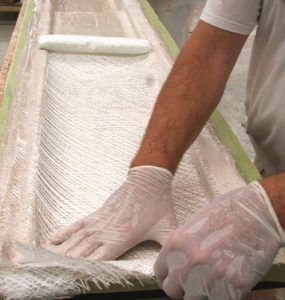
Cut the A1 Triaxial fibre to size in advance and create a new quantity of A1. You now apply the un-thickened A1 to the A1 top layer. Now you can laminate the A1 Triaxial fibre in it. Your brush from inside to outside to prevent any folds. No intermediate drying time is required to apply multiple layers of A1 Triaxial fibre.
If the underlying A1 layer is cured, a thin layer of A1 must be re-applied before the new A1 layer can be laminated with Triaxial fibre (wet in wet work).
Releasing the mould is often possible after 1 hour. For vulnerable objects, this period may be longer.
We advise that you apply at least 2 layers of A1 Triaxial fibre. From 4 layers of A1 Triaxial fibre onwards, it is proofed against vandalism. For fixing or capturing vulnerabilities, even 6 to 8 layers or more can be used.

Temperature and humidity
Temperature and humidity affect set time and curing of A1. For larger objects A1 Retarder can be used to extend the set time so that there is more time to work on the A1 object quietly. Provided the processing temperature is not too high and the air humidity is not too low, this is a good way of working.
The use of A1 Retarder for the application of the top layer (gelcoat layer) and in particular when working in moulds, we advise against it in hot weather (above 25°C – 30°C), in combination with low humidity. In hot and dry weather, a dry layer will quickly form on the surface, even before the curing process begins. The curing process seems to begin but the underlay is still soft. The risk of craquelure formation in the top layer and poor curing is therefore high. In addition, the adhesion to other A1 layers will be weaker. If possible, try to avoid working in conditions above 25 °C. An alternative is to add A1 Accelerator which will shorten the set time of A1.
Light spots / colour differences after releasing from a mould
Due to water evaporation some light spots, colour difference or ‘water marks’ can appear in your product. It might help to have a early demoulding.
A1 in combination with gypsum is a challenge because both products will adhese very easily. An option that might work, but please test it very very carefully yourself is to use shellac as a barrier. (http://en.wikipedia.org/wiki/Shellac). After applying the Shellac, you need a release agent, now you can use a solvent to your choice like Acoms, liquid soap, linseed oil or Vaseline. Important in your choice is if you want to paint it afterwards because some of these release agents do not work well with paint.
10. Laminating of an object

EPS glued with A1
2 parts of EPS can be glued together using A1. A1 acts as an adhesive in this instance.
EPS coated with a layer of A1
You can easily apply a layer of A1 to the EPS by brushing, spraying, rolling or filling it. Sometimes, it is necessary to thicken the A1 with A1 Thix A or A1 ATP Powder.
The strength of the A1 top layer also depends on the thickness of the A1 layer and the density of the EPS. To create a strong top layer, we recommend using 1 or more layers of A1 Triaxial fibre.

EPS coated with a layer of A1, reinforced with A1 Triaxial fibre
Brush EPS with A1. Secure the A1 Triaxial fibre in the still wet layer of A1. The A1 Triaxial fibre provides the strength to A1. The advice is to process at least 2 layers of A1 Triaxial fibre. From 4 layers of A1 Triaxial fibre onwards, it is proofed against vandalism.
Before applying the A1 Triaxial fibre, it is useful to cut it to size first, given the processing time of A1.
Because you work over an EPS form, the first layer will be the inner layer and will not be visible later. Very important is that the A1 Triaxial fibre is completely soaked with A1 in each layer before you apply the next layer of A1 Triaxial fibre. This is because dry on dry provides air inclusion and consequently a vulnerable spot in the object.
Sawing through a form
A1 has a processing time of about 20 – 25 minutes, after that the material is dry but still vulnerable. The advice to be able to saw and/or drill A1 properly is about a week as the A1 is (almost) finally cured. Sawing/drilling after 1 day is possible however be careful as the A1 object is not completely cured. You can use any sawing machine for this. Of course there is a difference in quality and skill of the machine. A water saw table or a dremel often give a nice result.
PUR/PIR FOAM
Although A1 on PUR/PIR adheres very well we advise to avoid the use of these foam systems. EPS can do the job with less risks compared to PUR/PIR. PUR/PIR is easier to shape by hand but that is probably the only advantage compared to EPS. Less risks, better water resistance and pricewise EPS is a better solution. Thermal expansion is more less the same as we see with EPS but the form stability and possible after-foaming caused by moisture is an problem with PUR/PIR. This has to do with the way of producing these systems.
Also, the use of PUR foam to fill up a product made of A1 is not to be advised as well. The chemicals inside the PUR foam can have a negative influence on the A1 and the unpredictable foaming with high pressures can cause cracking as well. Even when using 3 or 4 layers of A1 Triaxial fibre.
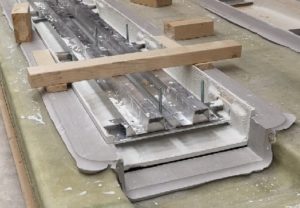
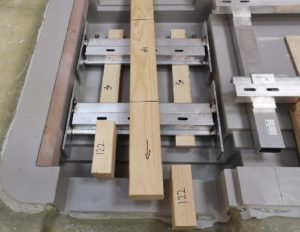
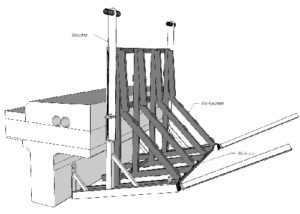
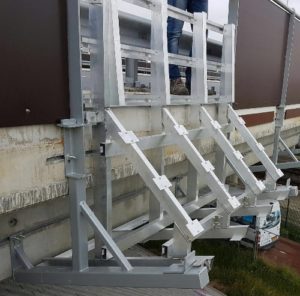
11. Supports moulds
For more information on making a A1 support mould we refer to our instruction sheet A1 support mould which can be downloaded via this link or watch the videos:
– How to make a A1 support mould with A1 Triaxial fibre
– How to make a A1 support mould with copped fibres
12. Smooth finish of A1
Thix A
Add A1 Thix A to the A1 to thicken the A1 into a paste. Apply the thickened A1 paste with a spatula or putty tool. This creates a layer that you can finish within 1 hour with a slightly damp sponge for a smooth result. After drying you can work on the A1 object with (waterproof) abrasive pads or (waterproof) sandpaper.
A1 ATP Powder
A1 ATP Powder is a volume thickener. This allows the A1 to be thickened to filler thickness. Thicken the A1 with ATP Powder; with this A1 can be thickened to filler thickness. The ATP Powder can be added indefinitely, until the desired thickness is reached. This does, however, result in a less strong product when a large amount of ATP Powder is added. ATP Powder can only be used for indoor applications.
The application of A1 with ATP Powder goes well with for example spatula, palette, putty knife etc.
You can still work the A1 within an hour with a damp sponge for an even smoother result. After drying you can if desired with waterproof abrasive pads or waterproof sandpaper further refine to an even smoother whole.
C-veil
C-veil is a thin glass fleece finish. Apply C-veil to the still damp last layer A1. If the A1 is dry, first coat it with a layer of A1. The C-veil is very easy to tear, small pieces are easy to press, so you can achieve a nice smooth and seamless result. If desired, a second layer with C-veil can be applied. Like the A1 Triaxial fibre, the C-veil cannot be sanded.
Here you can download the instruction sheet ‘Smooth finish’ for more information
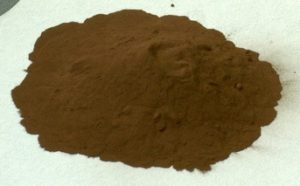
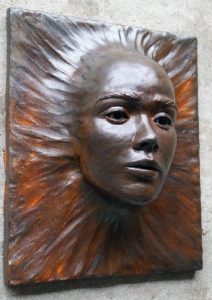
13. Metal powders
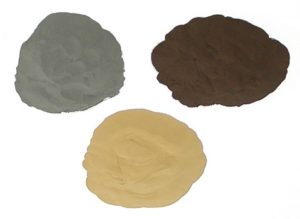
For example: It is possible to add up to 0.8 kg of metal powder to 1.2 kg of A1. Of course, less is also possible.
After curing of A1, which is provided with a metal powder, you can process it in different ways for the desired result;
• A1 sand lightly so that the metal powders come to the surface, these metal particles can be processed with oxidizing substances.
• A1 can be patinated hot or cold, use a low power burner when hot because only the metal parts need to be heated.
• Possible hot oxidizing patinas are copper sulphate and iron nitrate. Possible cold oxidizing patinas are sulphur liver, ammonia and vinegar.
• It is also possible to pigment the A1 so that the undertone is already in the desired colour scheme. E.g., with the patina sulphur liver (for dark bronze) the A1 can be pigmented with black pigment.
There are many possibilities in patinating and colour appearance. When using metal powder, the end result will vary. This has to do with oxidation. This depends on the chosen patina (hot or cold), the location of the metal particles in the A1 and the sub-colour with which the A1 is pigmented. The oxidation itself is an uncontrollable process and this will give every object a different appearance.
Tips:
• after the desired result of the metal powders A1 Sealer Matt or A1 Sealer Satin can be applied for protection so that the weather influences slow down the oxidation process.
• the oxidation of the iron powder can be stopped by using water with the addition of soda.
• if you work with a silicone mould, you can stimulate the oxidation process by extending the discharge time by a number of hours or days.
14. A1 Terrazzo

Make sheets of A1 in different colours. After curing break them in different sizes.
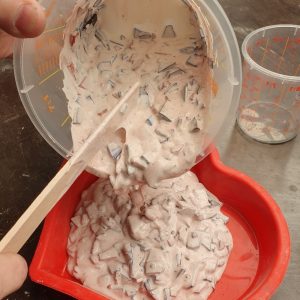
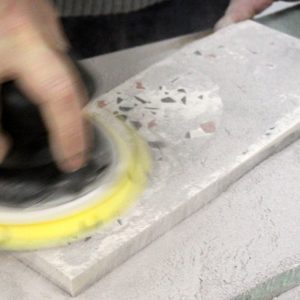

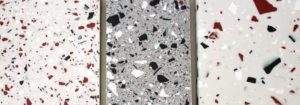

Add different colours of broken A1 to the mixed A1 and stir well. Apply in a mould and let the A1 cure. Sanding after releasing from a mould.
15. Technical data
Peak temperature
The peak temperatue of A1 during curing is about 40oC – 45oC. Even for larger volumes of A1 this temperature will be in the same range.
Not food approved
We do not have a food approval certificate for A1.
Expansion
During curing A1 will expanded between 0,1% ad 0,6%. The biggest advantage of this expansion is that A1 will make a perfect copy of the mould you are using by copying every (tiny) detail. This is the reason why A1 will feel and look like the original.
When using a polyester, metal or another stiffmaterial mould be aware that this needs to be self-releasing.
For A1 objects that need to be dimensionally stable use high shore silicone moulds or stiff material moulds.
Wax system
We recommend to use a high temperature wax system as a release agent for your moulds as we have discovered that these give the best results. Silicone moulds normally do not need a release agent.
Non-transparent
A1 has a creamy white colour after curing and is non-transparent.
16. A1 in an outdoor environment

FIRE
A1 has good to excellent fire resistance properties and can be used for projects with high fire resistance requirements.
We have tested A1 in accordance with EN 13501-1 and ASTM E84-15b.
European classification.
Classification of reaction to fire performance in accordance with EN13501-1:2002.A1(AcrylicOne)LP01andA1TriaxialFabric: B-s1,d0
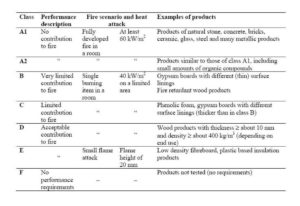
Classification of reaction to fire performance in accordance with EN 13501-1:2007+A1:2009.
A1 LP01 and A1 Triaxial Fabric + sand (25% of mass A1): A2 – s1,d0
USA fire rating
Evaluation of the surface burning characteristics of a material identified as A1 in accordance with ASTM E84-15b, standard test method for surface burning characteristics of building materials.
Flame Spread Index (FSI) :20
Smoke Development Index (SDI) :15


UV
UV has a strong influence on the durability of materials. 20+ year old A1 project in South Africa shows that (coated) A1 will withstand UV influence.
When an uncoated A1 object is exposed to (intensive) UV the very thin top layer of the A1 object will be affected (erosion) within a few months. This will mainly be noticeable by a change of the colour of the A1 object. After this initial period the erosion by UV will continue but at a very slow rate.
Adding sand to the A1 object (1 part A1 Liquid, 2 parts A1 Powder and 2 parts Quartz sand) will still result in an initial erosion of a very thin top layer but after this the added sand will almost stop the erosion process of the A1 object caused by UV.
For the best protection we advise applying layers of A1 Sealer (PLUS) to the A1 object as this layer will act as a barrier between the UV radiation and the A1. As the A1 Sealer (PLUS) will now be affected by the UV we advise to apply a new layers of A1 Sealer every 3 years and of A1 Sealer PLUS every 6 years. Other coating systems can be used as well if they are damp open (KEIM Soldalan) or the A1 object can release its moist at the backside of the A1 objects (for ventilated Cladding systems).

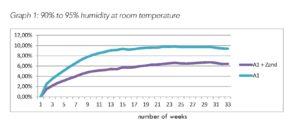
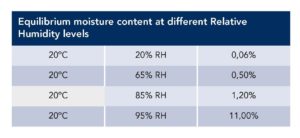
WATER
Similar to many other materials, A1 will attract moist/water at a humidity rate above 90%. As can been seen in graph 1 it will take several weeks at very high humidity level to reach the maximum levels of 10 to 11% water absorption. If we add sand to the A1 (1 part A1 Liquid, 2 parts A1 Powder and 2 parts Quartz Sand) the water absorption is significantly lower.
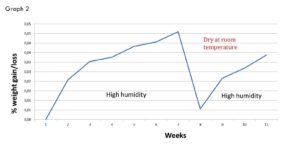
An A1 object will release its water when placed in an environment with a lower humidity (below 70%) at a high speed as can be seen in graph 2. It only takes a few days to reach the levels at starting point.
Exposure of an A1 object to very high humidity environment is possible for several months without affecting the A1 object. The use of an A1 Sealer or coating system will extent this period as it acts as a barrier between the humidity and the A1 object.
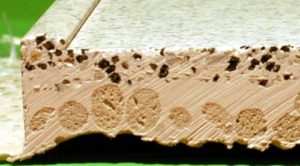
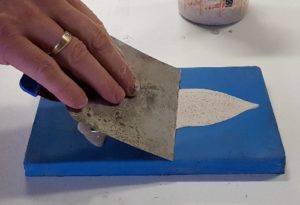
We have also tested A1 objects fully submerge under water and tested the quality of the top layer with the use of a Shore measurement (picture 1 and 2). Based on these tests an A1 object can be fully submerged under water for a period of 2 months without weakening the top layer. After this period the top layer weakens and the A1 will slowly dissolves in the water.
Question: Can we use A1 to build a fish pond?
We do not advise you to use A1 because A1 cannot stand permanently under water for long periods, as A1 is vapour permeable.
Question: We would like to use A1 to make a soap holder. Be careful as the soap might react with the A1 or more likely the continuous water beneath the soap which is entrapped between the soap and the A1 soap holder will affect the A1.
Question: We would like to use A1 in a water park and the A1 elements will frequently be exposed to water.
If the A1 object is constructed in such a way that the splash water can easily drain off and in combination with a good coating, we do not expect any problems. In places where the splash water can collect, we advise not to use A1.
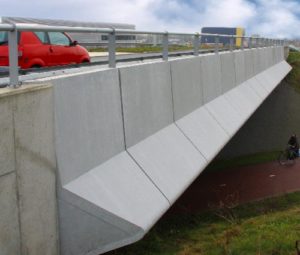
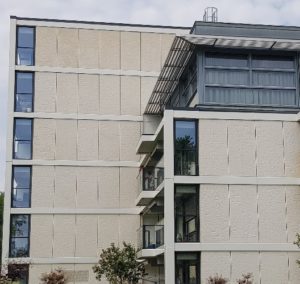
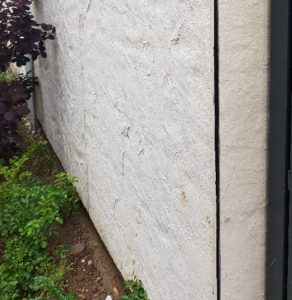
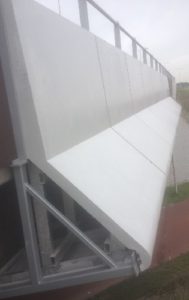
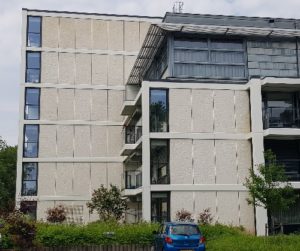
Façade Nijmegen
The façade panels are placed close to ground level. This is possible as the A1 panels will release possible rainwater at a very high rate. Furthermore, these panels are coated with A1 Sealer which protects the A1 façade.
Bath Bunny
This A1 object with a polystyrene core is floating in the Rotterdam waters for several years now. The layer of A1 coated onto the polystyrene core is in good conditions excluding the layer of A1 which is fully submerged under water, which has dissolved in the water. The layer of A1 which is directly at the waterline is still fine as it does absorb water in rough conditions but has the opportunity to release this water when exposed to air.

Totem pole
This totem pole placed in a swimming pool is at the top made of A1 with a foam core. The lower part (50 cm) is made of polyester

17. Reinforcement & Construction
To attach reinforcement materials, simple glueing can be used by laminating with A1 and Triaxial fibre. It is also possible to glue materials with bonding products. Observe the manufacturer’s instructions. Excellent adhesives include MS polymer sealants. Other influences that should be taken into account are thermal and weather influences. In addition, influences that may vary per location, such as wind load, are important to take into account.
For detailed construction methods of several A1 projects see our report: Design Guide A1 structures.
A1 has good adhesion to materials such as wood and iron and is therefore an ideal combination in many situations. A major disadvantage of wood and iron is that both materials react to moisture. Wood will absorb moisture and expand. We see the same process with iron, which oxidises in contact with moisture.
A1 is a water-borne material and a small amount of residual moisture will also be present in the A1 object after curing. In addition, A1 absorbs (to a limited extent) moisture in a humid environment, which can come into contact with the wood or iron. The reaction of the wood or iron to the moisture (expansion) can have consequences for the A1 in the form of markings and possible tearing of the A1.
A1 is often used as covering material for many different types of materials including EPS, plaster and many other foams/materials. In itself, this is perfectly applicable,
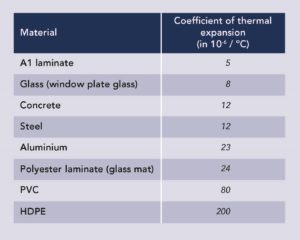
but a number of factors must be taken into account. Especially when using A1 over materials that are themselves very sensitive to moisture such as plaster, you should take into account blistering, drawing through of moisture spots or other problems. In outdoor applications, these materials are not recommended. In indoor applications, it is fine if triaxial tissue is also used, which reduces the risk of cracks drastically. It is advisable to use at least one layer of triaxial tissue in almost all applications. Due to the differences in thermal expansion of the materials, crack formation can easily occur without reinforcement. This is usually done by a greater thermal expansion of the materials compared to A1. A1 can absorb this but the thinner the A1 layer the greater the risk.
EPS, galvanised iron, stainless iron and aluminium will not react or react less to the moisture present and are therefore better alternatives. However, we do recommend taking into account the differences in thermal expansion when changing temperatures of the different materials.
18. A1 Sealer
There is a choice of A1 Sealer (PLUS) Matt and A1 Sealer (PLUS) Satin. For the most matte result we recommend first applying a layer with the A1 Sealer (PLUS) Satin and then a layer with A1 Sealer (PLUS) Matt.The advantages are: 1 component, solvent-free, water-based, quick-drying, easy to apply, good UV resistance, excellent adhesion, protection against dirt absorption and good protection against moisture.
Data:
• Min processing temperature: 10°C
• Average consumption: 8-10 m2 per litre
• Storage life: 1 year in closed package
• Storage: Store frost-free and out of direct sunlight
Application of A1 Sealer (PLUS):
1. The surface to be sealed must be free of wax, oil, dirt or dust.
2. Apply with a brush, roller, or by spray.
3. If the A1 Sealer (PLUS) is applied with a brush, we recommend adding 30% water. When spraying, we recommend adding 30-50% water.
4. After application, the A1 Sealer (PLUS) should be rubbed out with a dry cloth when it is still damp. When spraying the A1 Sealer (PLUS) it is not necessary to polish the A1 Sealer (PLUS).
5. Each layer has a drying time of 15 to 45 minutes, which also depends on temperature and humidity.
6. A1 Sealer (PLUS) may be applied in 1 to a maximum of 3 layers to improve the protective properties.
The A1 Sealer (PLUS) is a so-called breathable coating. In addition to any residual moisture after production, A1 absorbs water to a limited extent if placed in a highly humid environment and this water is also (many times faster) released again in a dry environment. With the help of this breathable (vapour open) Sealer A1 can easily leave the A1 object with any remaining and/or absorbed moisture. Therefore, avoid applying too thick a layer of A1 Sealer as this may close the A1 object.
The consumption of the A1 Sealer (PLUS) per kg applied by brush is 8 to 10 m2. The consumption for spraying the A1 Sealer (PLUS) per kg is 10 to 12 m2.
Check for damages
We recommend applying the A1 Sealer every 3 years and the A1 Sealer PLUS every 6 years. Furthermore, we recommend that you check the A1 object annually for possible damage to the A1 Sealer (PLUS) so that it can be repaired immediately. This inspection is also a good opportunity to clean the A1 object if necessary.
Patinate with A1 Sealer (PLUS)
A1 can also be patinated by adding pigment to the A1 Sealer (PLUS). By applying it with a brush, cloth or syringe you can achieve different effects. It is also possible to use different colours on top of each other.
We recommend using an unpigmented layer A1 Sealer (PLUS) as the last layer, with the choice of A1 Sealer (PLUS) Satin or A1 Sealer (PLUS) Matt.
Waterproof
Question: The A1 objects lie in the grass. They all had at least 2 layers A1 Sealer. Today I turned the long and the short object. The bottom has turned brown! The A1 Sealer makes them waterproof, right?
Answer: The A1 Sealer is not waterproof, but breathable. The brown colour is probably caused by the moisture in the soil. Two layers of A1 Sealer is usually sufficient, but with prolonged moisture loading, which is the case here, there is a risk of discolouration.
Lifespan
We recommend applying the A1 Sealer every 3 years and the A1 Sealer PLUS every 6 years. Furthermore, we recommend that you check the A1 object annually for possible damage to the A1 Sealer (PLUS) so that it can be repaired immediately. This inspection is also a good opportunity to clean the A1 object if necessary.
19. Coatings (for outdoor use)
A1 Sealer (PLUS)A1 Sealer (PLUS) is the most common one-component sealer to protect A1 products for outside use. It is easy to apply in one or more layers. The more A1 Sealer (PLUS) you apply the more gloss will appear. It also can be used as a base resin for patina to decorate and give products a natural look. Advantages of the sealer: one component, solvent free, easy to apply, good UV resistant, protection against dirt pick up, quick drying, excellent adhesion and good humidity protection.
By our users also other coatings and sealers are used to enhance and/or protect the desired aesthetic properties (aesthetic and performance) of the A1 objects upon which they are applied. Below, you will find a list of several coatings/sealer’s that (appears to) work well with A1. Information is based on projects from the past and achieved results after ageing in Weathering/UV cabinets. Depending on climate in different parts of the world, the lifespan and maintenance time of the different coating systems can vary.
Exterior wall paints
Exterior Wall Paints are available in a variety of brands and formulations, all with their specific features. Keim Soldalit is a Multi-purpose, silicate exterior paint on a sol silicate binder basis (combination of silica sol and water glass) for organic, mineral and mixed substrates. KEIM Soldalit is water-repellent, highly water vapour permeable, lightfast, UV-stable, extremely resistant to weathering with minimal soiling tendency.
2K Polyurethane coatings
2K Polyurethane coatings are available in a variety of brands, formulations and qualities. Baril 269 Poluran Clear Coat 75 is a high-quality coating with excellent adhesion on A1 composite products. This Semi-Gloss transparent coating is easy to apply and has high abrasion and chemical, high mechanical and impact resistance. The good flexibility and weathering/UV resistant results in a long-lasting protection of products made of A1. Be aware that 2K coatings are NOT vapour permeable, which could create water entrapment, if the A1 application is also closed on the back and not fully cured.
Acrylic paint, oil paint or lacquer
For indoor use, the A1 object can be finished with acrylic paint, oil paint or lacquer, provided that the adhesion of the paint has been tested beforehand.
If you choose such paint and final lacquer (matt or high gloss), we recommend, in addition to testing, to observe the following points:
• make the object inside,
• dry and cure the object completely,
• after about a week to paint (drying time on the advice of the paint supplier),
• then varnish (drying time on the advice of the supplier).
• An A1 Sealer is not necessary then.
For outdoor applications, such coating systems can interfere with the breathability of A1, which can lead to flaking of the coating layer.


20. A1 Façades
Appearance
A façade provides information about the function of the building and presents itself through its appearance. With A1 an almost infinite number of (natural) radiations and colours can be achieved by adding (natural) filling materials. By using (silicone) moulds almost every structure can be reproduced.
Freedom of form
Because after mixing the A1 Liquid with the A1 Powder the A1 has a liquid form, almost any form can be created. This creates interesting opportunities for designers who are looking for special forms in their design.
Lightweight
By using our A1 Triaxial glass fibre, it is possible to create lightweight panels/objects with a thickness of approx. 6 mm and a weight of ca 12 kg/m2. This makes A1 panels applicable where other materials become too heavy. This also simplifies the installation of the panels.
Excellent fire resistance properties
A1 has excellent fire resistance properties and can be used for projects with high fire resistance requirements.
Classification of reaction to fire performance in accordance with EN 13501-1:2002. A1 (Acrylic One) LP01 and
A1 Triaxial Fabric: B-s1,d0
Classification of reaction to fire performance in accordance with EN 13501-1:2007+A1:2009. A1 LP01 and A1 Tri-axial Fabric + sand (25% of mass A1): A2 – s1,d0
Evaluation of the surface burning characteristics of a material identified as A1 in accordance with ASTM E84-15b, standard test method for surface burning characteristics of building materials.
Flame Spread Index (FSI) : 20
Smoke Development Index (SDI) : 15
Processing
A1 is water-based and contains no harmful substances. This makes it a safe material to work with. Also, there are no expensive investments in equipment needed to be able to use A1. This means that A1 can be used in almost all types of production environments, provided that they have a proper heat and moisture balance.
Renovations
Because of the above advantages, A1 is very suitable for the renovation of buildings where the original radiations must be preserved, but without using these building materials.

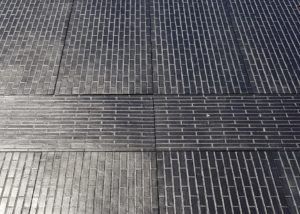


Substitute for natural stone and brick
Natural stone and brick are traditionally the materials for load-bearing walls and columns. A1 can serve as a good alternative to these materials. Natural stone is precious, and its strength varies considerably. Brick as a load-bearing material has declined sharply in recent decades. With the introduction of the cavity wall, solid brick exterior walls can be replaced by thin A1 wall panels with a brick look.
Substitute for concrete
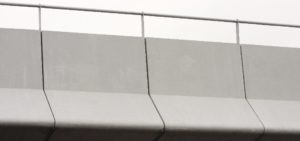
Decorative elements are often executed in a concrete appearance. By adding pigments and fillers it is possible to achieve a large number of different concrete radiations with A1, but in panels with enormous weight savings.
Substitute for wood
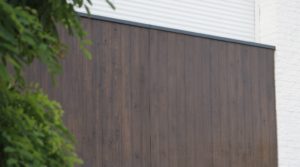
Wood is a widely used material for façades and decoration. Panels made of A1 not only have the appearance of wood but also meet the highest fire requirements.
Substitute for metal
Various metal powders are added to A1, allowing different metal radiations to be achieved, such as bronze, iron, copper and zinc. For A1 façades, we only add these metal powders in the top layer, so that we achieve the desired appearance with little metal.
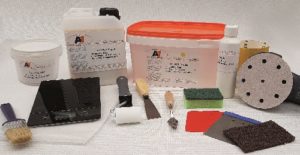
21. To get started
is the way to get acquainted with A1. This kit consists of a selection of the most popular additives and filling materials with which it is possible to extensively explore the possibilities of A1 itself.
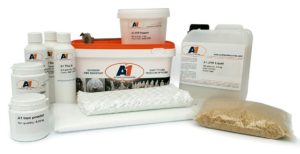
Content:
– 2,5 kg A1 Liquid
– 5 kg A1 Powder
– 5 m2 A1 Triaxial fibre
– 1 m² C-veil
– 0,25 kg A1 Retarder
– 0,25 kg A1 Thixtrope A
– 0,25 kg A1 Sealer
– 0,25 kg Iron powder
– 0,25 kg Black pigment
– 1 kg ATP Powder
– 30 mm High Shear Mixer
– 1 kg filler sand
Workshops
During our ‘Introduction to A1’ workshop you will be introduced to the possibilities of this special product. During this 3-hour workshop we will demonstrate laminating and casting with A1.

Subjects:
– mixing A1
– different A1 additives
– A1 reinforcement materials
– the use of filler material
– A1 on EPS (polystyrene)
– Working with silicone moulds
There is also plenty of room for asking questions and you will be given the opportunity to start working with A1 yourself. Afterwards, all participants receive a basic or extended starter set (to be specified when ordering) to be able to continue practising independently.
Webshop
For the complete range of A1 look at our international webshop: shop.acrylicone.nl
Website:
www.activecomposite.com with lots of previews and information about working with A1. You can also find our distributors here.
Facebook and Instagram:
for an overview of the most recent A1 projects.
– Facebook: www.facebook.com/AcrylicOne
– Instagram: @acrylic_one
Questions:
Our team of A1 specialists remain at your disposal if you were to have any additional questions. Send your questions to info@acrylicone.com
Do you want to contact us in person? Call us at +31 187 663006 during office hours.